Are you ready to transform your stunning PSD designs into a fully functional WordPress website?
Converting PSD to WordPress might sound like a daunting task, but with the right guidance, it can be a rewarding experience that brings your creative vision to life on the web.
In this step-by-step guide, we’ll walk you through the entire process, sharing practical tips and expert insights to ensure your journey is smooth and successful.
Whether you’re a designer looking to expand your skills or a business owner eager to launch a captivating website, this guide is your ticket to unlocking the full potential of WordPress.
Let’s dive in and get started!

If you need help creating your website, don’t hesitate to contact us. Click here.
Step-by-Step Guide to Converting PSD to WordPress
Step 1: Slice the PSD File
Before you can bring your beautiful PSD design to life on WordPress, you need to understand the concept of slicing.
Slicing is the process of breaking down your PSD file into smaller image files that can be used in your website’s design.

To get started, you’ll need some handy tools. A popular choice is Adobe Photoshop, which many designers use for its extensive slicing features.
Another option is GIMP, a free alternative that also offers robust slicing capabilities. By using these tools, you can ensure each element from your design – like buttons, banners, and backgrounds – is perfectly captured and ready for web use.
Step 2: Create an HTML and CSS Template
Once you’ve sliced your PSD into individual images, the next step is to convert these pieces into a functional HTML file. Think of HTML as the skeleton of your website – it’s the basic structure that holds everything together.
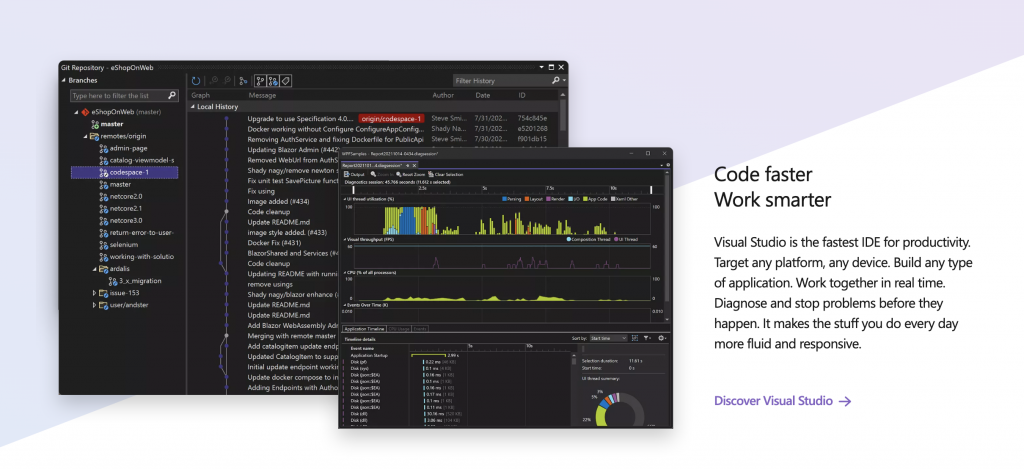
To begin, open up a text editor like Sublime Text or Visual Studio Code. Start by writing out the structural elements of your page using HTML tags.

For instance, use <div> tags to define different sections of your webpage, like headers, footers, and main content areas.
Make sure to include the sliced images by using the <img> tag, placing them exactly where they belong in your design.
With your HTML file in place, it’s time to add some style with CSS (Cascading Style Sheets). CSS is like the clothing and makeup for your website – it dictates how everything looks and feels.
By writing CSS rules, you can control the layout, color schemes, fonts, and more, ensuring that your web page mirrors your PSD design.
Here are a few tips to keep in mind:
- Use Flexbox or CSS Grid to create modern, responsive layouts that adapt seamlessly to different screen sizes.
- Take advantage of CSS classes and IDs to apply styles efficiently across similar elements.
- Test your layout in different browsers to ensure consistent appearance.
As web designer Ethan Marcotte once noted, “Responsive web design offers us a way forward, finally allowing us to ‘design for the ebb and flow of things.'”
By using HTML and CSS effectively, you can ensure your website not only looks great but also provides a seamless experience for every visitor.
Step 3: Integrate HTML/CSS with WordPress
Now that you’ve crafted your HTML and CSS template, it’s time to integrate it with WordPress to make your website dynamic and easy to manage.
This involves breaking down your HTML structure into WordPress theme files, which will allow WordPress to manage different parts of your website efficiently.
Start by familiarizing yourself with the basic structure of a WordPress theme. Typically, this includes several key files like header.php, footer.php, index.php, and style.css. These files correspond to different sections of your web page.
For example, header.php will contain code for the top part of your site, such as navigation menus and logos, while footer.php handles the bottom.
Here’s a simple breakdown of how to proceed:
- Divide Your HTML: Take the existing HTML file and split it into these separate files. Move the code responsible for the page’s header into
header.php, and similarly, place footer-related code intofooter.php. - Use WordPress Functions: Replace static elements with WordPress template tags and functions where necessary. This allows dynamic content to be pulled from WordPress. For instance, use
<?php bloginfo('name'); ?>to display the site name dynamically. - Link CSS Properly: Ensure that your CSS is being called correctly by adding it to the
functions.phpfile using WordPress’swp_enqueue_style()function. This method helps avoid conflicts and ensures styles are loaded efficiently.
Maintaining clean code throughout this process is crucial. Clean code is not only easier to read and debug but also enhances your site’s performance and scalability.
Avoid cluttering your files with unnecessary code and comments, adhere to consistent formatting, and keep functions well-organized.
Step 4: Add WordPress Tags and Functions
With your HTML and CSS now integrated into WordPress, the next step is to make your website dynamic by adding WordPress PHP tags and functions. This transformation will allow your site to pull content directly from the WordPress database, providing a seamless and interactive experience for both you and your users.
Incorporating WordPress PHP Tags:
PHP tags are snippets of code that enable WordPress to display dynamic content. By replacing static elements with these tags, you ensure that content like posts, pages, and metadata are automatically updated as you manage them through the WordPress admin panel. For example, instead of hardcoding your site’s title, use <?php bloginfo('name'); ?> to fetch it dynamically. Similarly, for your site’s tagline, you can use <?php bloginfo('description'); ?>.
Here are some commonly used tags:
<?php the_title(); ?>: Displays the title of a post or page.<?php the_content(); ?>: Outputs the main content of a post or page.<?php get_template_part('template-parts/content', 'page'); ?>: Includes template parts for better code organization.
Using WordPress Functions:
WordPress offers a wide range of functions that enhance functionality and interactivity. These functions help manage everything from displaying posts to handling user authentication. For instance, use wp_nav_menu() to generate a dynamic navigation menu, or get_sidebar() to include a sidebar widget area.
Here’s how to implement these effectively:
- Navigation Menus: Use the
register_nav_menus()function in yourfunctions.phpfile to define custom menus. Then, callwp_nav_menu()in your theme files to display them. - Widgets: Enable widget areas with
register_sidebar(), allowing users to customize widgets through the dashboard.
By using WordPress tags and functions, you not only make your website dynamic but also give yourself the flexibility to update and manage content effortlessly.
Step 5: Test and Optimize Your Theme
With your WordPress theme almost ready to launch, it’s crucial to ensure that it performs flawlessly across all platforms. Testing and optimizing your theme will guarantee a smooth user experience and help your site achieve its full potential.
Test on Various Devices and Browsers:
Start by checking how your website looks and functions on different devices and browsers. This ensures that all users, regardless of their device or browser choice, have a consistent and enjoyable experience. Here’s how to approach this:
- Responsive Testing: Use tools like Google Chrome’s DevTools or BrowserStack to simulate how your site appears on various screen sizes, from desktops to smartphones. Make adjustments as needed to ensure elements are properly aligned and accessible on all devices.
- Cross-Browser Compatibility: Test your site on popular browsers like Chrome, Firefox, Safari, and Edge. Each browser may render elements slightly differently, so ensure that your design remains intact across the board.
Optimize for Speed and Performance:
A fast-loading website not only improves user satisfaction but also boosts your search engine rankings. Here are some key strategies for optimizing speed:
- Image Optimization: Compress images using tools like TinyPNG or ShortPixel without sacrificing quality. This reduces load times significantly.
- Minify CSS, JavaScript, and HTML: Remove unnecessary characters from your code (such as spaces and comments) to reduce file sizes and improve load times. Plugins like WP Rocket can automate this process.
- Leverage Caching: Use caching plugins such as W3 Total Cache or WP Super Cache to store static versions of your pages, reducing server load and speeding up delivery.
By thoroughly testing and optimizing your theme, you ensure that it not only looks great but also performs efficiently. As web performance expert Tammy Everts notes, “Faster sites make more money.” By investing time in this stage, you’re setting up your website for success both in terms of user experience and search engine optimization.
Common Challenges and Solutions
Challenges
- Responsive Design Issues
Ensuring your site adapts well to different screen sizes can be tricky, leading to misaligned elements or cramped content on smaller devices. - Cross-Browser Compatibility
Different browsers may render your site differently, causing inconsistencies in appearance and functionality. - Slow Page Load Times
Large images, unoptimized code, and lack of caching can slow down your website, affecting user experience and SEO. - Maintaining Design Consistency
Inconsistencies in design elements can disrupt the user experience and detract from the site’s overall aesthetic. - Navigational Issues
Poorly designed navigation can make it difficult for users to find information, leading to frustration and increased bounce rates.
Solutions
- Utilize media queries and flexible grid layouts to create a responsive design that maintains its integrity across various devices.
- Use vendor prefixes for CSS properties and employ testing tools to ensure your site looks and functions correctly across all major browsers.
- Optimize images, minify CSS and JavaScript files, and leverage browser caching techniques to enhance site speed and performance.
- Establish and follow a consistent style guide, and utilize CSS frameworks to ensure uniformity across all pages and components.
- Design clear, intuitive navigation menus and ensure links are easily accessible, enhancing usability on all devices.

If you need help creating your website, don’t hesitate to contact us. Click here.
Conclusion
Converting your PSD design to a WordPress site is a rewarding journey that transforms static visuals into a dynamic, engaging online presence. By following this guide, you’ve learned how to slice your PSD, create HTML and CSS templates, integrate them with WordPress, and optimize for performance. You’ve also tackled common challenges like responsive design and cross-browser compatibility, ensuring a seamless experience for all users.
If you need any assistance or want to ensure your PSD to WordPress conversion is executed flawlessly, we’re here to help. Feel free to reach out via our contact form, or connect with us on Instagram or Facebook. Let’s bring your vision to life!

